GUIDE: How to fix the Global Menu applet, to display all the items when is placed on the left

One of my main reasons to choose Ubuntu Budgie over other distros around here, its that it beautifully integrates a Gnome desktop without Gnome Shell (so it’s light on resources and highly customizable), and it includes a Global Menu. After a decade of being a Mac user, a global menu is an indispensable part in my productivity workflow.

But as you know, the Global Menu applet has display problems when it’s placed on the left side instead of in the center, because it will cut the items in the menu once the text reaches the middle of the panel.

After many tests and experiments with CSS, I have found a small fix for this.

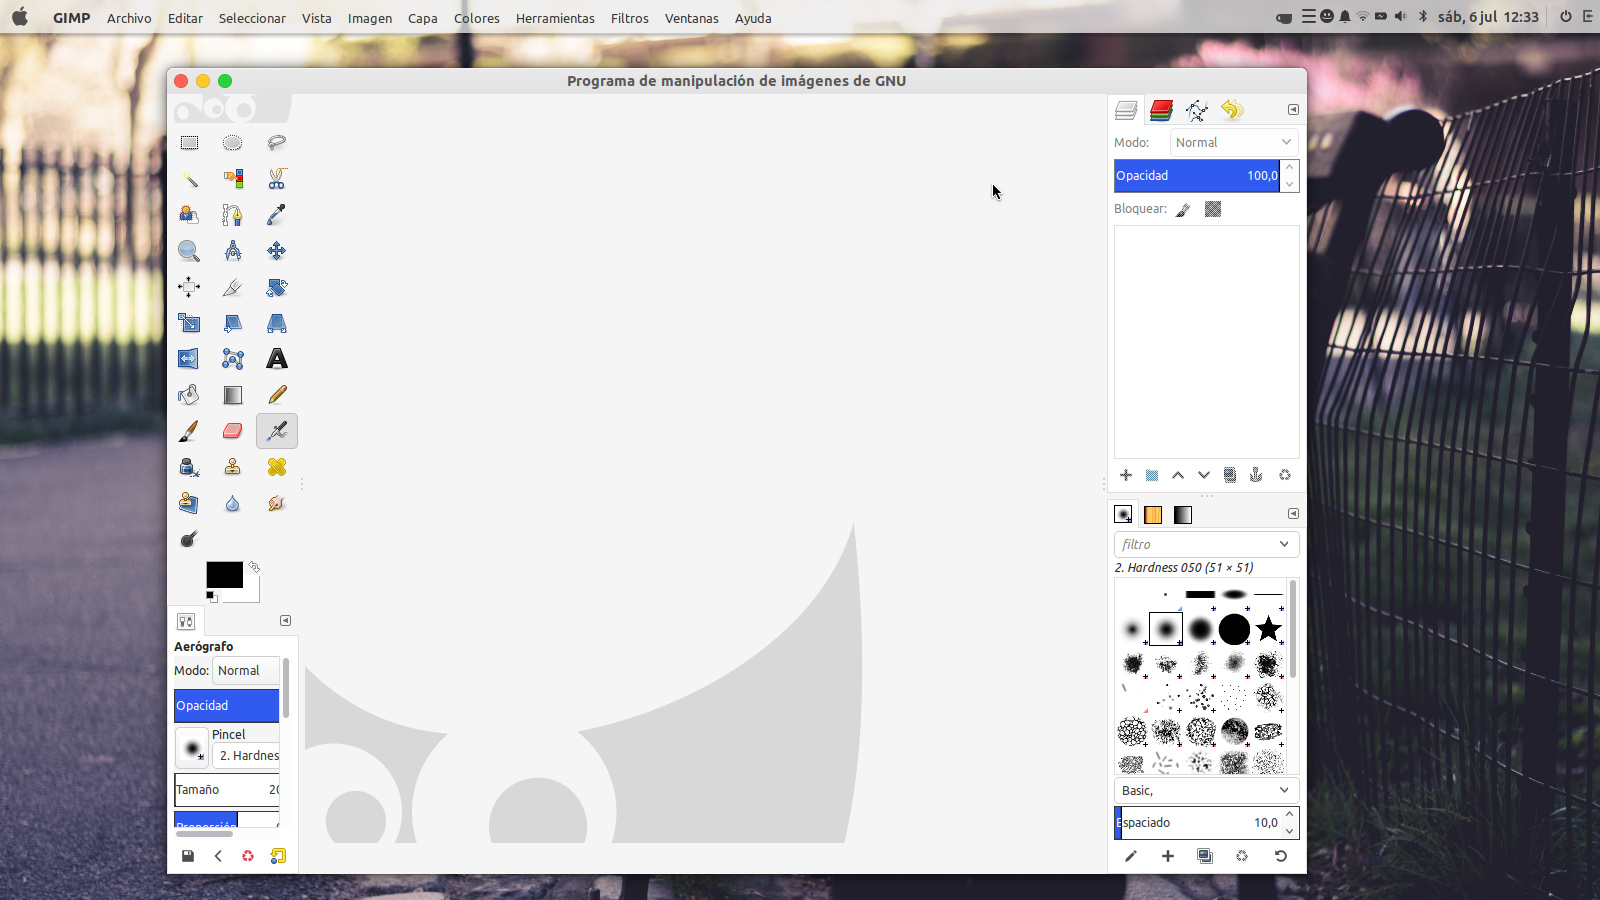
Basically, we will use the global GTK settings to override the size of the fonts set by your current theme. This will not fix the cutting problem, but it will guarantee that even in applications like GIMP or Inkscape, all the menus are displayed on the screen.

This has been tested on Ubuntu Budgie 18.04 and 19.04, and it works with all the themes.

Go to your personal folder, and inside the .config folder, you will see one called gtk-3.0.

Create a new empty file inside this folder, using this name:

gtk.css

Basically, every CSS rule placed inside this gtk.css file will override your theme settings.

Open the gtk.css file with a text editor, and copy this:

.-vala-panel-appmenu-private > menuitem:not(:first-child) > label {
   font-size: 13px;
}

Save and close the document, and reboot your computer.

With this fix, you will make the secondary items to have a smaller typography than the title of the application, so they will take less space on the screen.

This not so elegant fix will work if you are using the default typographies. But if you really want to have the first menu of the item and the subitems using the same size, and if you have a more scalable typography set as the default on the system, like the San Francisco font family by Apple, you can try this code instead:

.budgie-panel {
    font-family: 'San Francisco';
    }

.-vala-panel-appmenu-private > menuitem:not(:first-child) > label {
   font-weight: lighter;
}

In this case, we are setting a different font family that will be applied to all the elements on your panel, and only changing the weight of the font for the sub items in the global menu. In theory, it should work. And you can experiment with different font families.

Of course, maybe you hate the idea of having two different font sizes or weights for the items in the menu, so you have this third solution:

.budgie-menubar {
font-size: 13px;
}

And lastly, one final step. In the case of GIMP, the name of the application is too damn long, something like GNU Image Manipulation Program, so it will take a lot of space from your menu.

But don’t worry, you can change this to simply GIMP. So all the menu items will fit on the left side of your panel.

Go to your /usr/share/applications folder.

Open the GNU Image Manipulation Program file with a text editor and as an administrator.

You will see this line:

Name=GNU Image Manipulation Program

Change the line to this:

Name=GIMP

After this, the complete menu for applications like GIMP or Inkscape will be correctly displayed on the screen.

This has been tested on a monitor using a 1600x900 resolution, and it works like a charm.

1 Like

Excellent!

The real fix is to change the “visibility” of the Center GTK Box - from visible to invisible.

You can test this by running:

GTK_DEBUG=interactive budgie-panel --replace

Then navigating to the center GTKBox for the panel and changing the visibility property.
The code is here https://github.com/solus-project/budgie-desktop/blob/master/src/panel/panel.vala - so at the bit that populates the panel it needs to say “and finally are there any more child objects in the GTKBox - if not, then set the visibility property to hidden”

Anyway - the above is useful for anyone who wants to have a try “hacking” the desktop code. Happy to include any small patch developed to resolve this for all (ubuntu and anyone else interested)budgie desktop users

Damn, fossfreedom, you have make my day!

I have lost the count of hours struggling with this problem.

Your solution should be pinned in some part of the forum.

Becase the incorrect display of the global menu is one of the most common problems that will face new users.

And believe me, one of the greatest seller points of Ubuntu Budgie is having a global menu.

Specially, after Canonical stopping the development of Unity.

Cheers!

Ok, I’m a bit dumb.

I have run the command:

GTK_DEBUG=interactive budgie-panel --replace

I have made the middle GTKBox invisible, so now the menus are correctly displayed.

But how can I save the changes?

If I close the terminal, the panel will disappear.

And after rebooting the computer, the changes will not be applied.

ah - indeed. The GTK_DEBUG=interactive stuff is really for developers to play - to understand how an application (such as budgie-panel) is structured. You can also develop CSS as well.

Once you have understood what properties to fiddle with, you then have to express that in the GTK application itself i.e. you don’t just “save” the result. Hence the link I mentioned how to compile the code and where to look in the code to find the appropriate place to make the properties and CSS changes you were fiddling with in the GTK_DEBUG=interactive box.

Oh, I see.

Compile, or even understand code is too much for me :slight_smile:

i-dont-know-what-im-doing

Giving that the cheap trick that I posted can be applied without any knowledge of code, by simply creating a new text file in a folder that doesn’t require root privileges, I hope that it can be useful for normal users like me.

By applying custom CSS, it’s impossible to find a better solution. I tried tens more of hacks without success, like putting the global menu in the center, and then using CSS properties like display-block, padding and border to move the menu to the left.

Nothing worked.

But the GTK_DEBUG command is ultra-useful for doing CSS testing without having to reboot the computer to test each change, so thanks for the tip.

It will be great for some custom modifications that I still need to apply to my Budgie panel.

@Monteiro @fossfreedom these are very promising…

I don’t understand here how you get the center part of panel « invisible » ?

Did you change something in the ( vala ) code of applet itself ?

It needs a code change in budgie-desktop itself to make the centre box invisible if there are no applets displayed by it.

The debug statement above just shows how you can find the properties to fiddle with.

So the information is there for anyone who wants to have a go fixing the issue.

The first post is basically a workaround. It doesnt fix it properly but it is worth having a closer look until a proper fix can be devised.

I have made a small improvement to my code, using the padding property to better align the different size of the fonts, in a way in which you won’t see the difference in sizes.

.budgie-menubar {
   padding-top: 3px;
}

.-vala-panel-appmenu-private > menuitem:not(:first-child) > label {
   font-size: 13px;
}

With Ubuntu Budgie 18.04, and without changing the default font family, this is how your menus will look: